2.2 Introduction to Character Vectors
After familiarizing yourself with the numeric vectors in Section 2.1, we will introduce another member of the atomic vector family: character vectors.
2.2.1 Creation, class and storage type
A character vector is another type of atomic vector (where all elements are of the same type). In a character vector, the value of each element is of character type, which means each element is a string. A string is a sequence of characters (including letters, numbers, or symbols) surrounded by the double quotes (e.g. "a_string") or single quotes (e.g. 'another_string'). For consistency, we will stick with double quotes in this book.
The first example: if the word book is surrounded by a pair of double quotes, then it is a string, and "book" is a character vector with length 1. The value of "book" is the string itself. Notice that here "book" is a vector without a name since we have not assigned its value to a name. You can then verify the number of strings using length() and the vector type by class().
As you can see, the length of the character vector is 1, which means it contains only one element. The class() function returns character, indicating that this is a character vector.
Next, let’s assign the value of "book" to a name (say r02pro) using the assignment operator <-. This is how you create a character vector with a name.
Double quotes need to be paired in strings. If you miss the right double quote, R will show a plus on the next line, waiting for you to finish the command. If this happens, you can either enter the matching double quote, or press ESC to escape this command.

Figure 2.4: Miss the right quotation mark
Next, let’s create a numeric vector num_vec with number 708. After adding a pair of double quotes around the number 708, “708” has converted to a string now. You can assign the value “708” to a name (say char_vec), which will create a new character vector named char_vec. Don’t forget to check the vector type by using class() if you are not sure.
Also, strings can contain symbols. For example, you can create a character vector with “gph&708”.
In conclusion, if characters (including letters, numbers, and symbols) are surrounded by double quotes, it will be interpreted as a string by the R language.
Similar to a numeric vector, you can have multiple elements in a character vector, using the c() function to combine several strings into a single vector. You can verify the number of elements in a vector by using the length() function.
Now we know how to obtain the length of a vector, but what about the length of a single element within a given vector? Function nchar() can help us with that, as you will get the number of characters in a string.
As shown in the example, we can see that there are three elements in the animals vector, and string “sheep%29” has a length of 8 (including 5 characters, 1 symbol, and 2 numbers). Similarly, “bear$11” and “monkey@66” have a length of 7 and 9, and you can check it by yourself with the nchar() function.
Same as the numeric vector, you can use the typeof() function to find the internal storage type of a character vector. All the character vectors will be stored as the character in R. You can check the storage type of some character vectors we created before.
Finally, you can use the vector(mode, length) function to create a character vector of certain length.
Note that the default value is an empty string for all elements.
2.2.2 Change case
In character vectors, each string can contain both uppercase and lowercase letters. You can unify the cases of all letters inside a vector. Let’s review the character vector four_strings first,
As one could observe, the vector four_strings contains a mix of uppercase, lowercase, numbers, and symbols. In order to convert all convertible characters in each string to lowercase, you can use the tolower() function.
The converted result can be shown directly, or saved as a new vector with your name of preference. For example, after four_strings is passed to tolower(), the returned result was saved to lower_strings.
One should also notice that, numbers and symbols within a string will not be changed, as they are non-alphabetic characters.
The opposite operation of tolower() is toupper(), which converts all characters in the vector to uppercase.
2.2.3 A Deeper Look at R Help Documentation
In Section 1.2.3, we introduced three common ways to get help in R, which can help you know more about a particular function. In this section, we will review these methods by taking toupper and tolower as examples.
- Use a question mark followed by the function name
?tolower - Use help function
help(tolower) - Use the help window in RStudio
Use any of the methods listed above to get the documentation for the function tolower(), and let’s take a detailed look at it.
Different from the documentation of the sign() function, you will the title is named “Character Translation and Casefolding” (Figure 2.5).
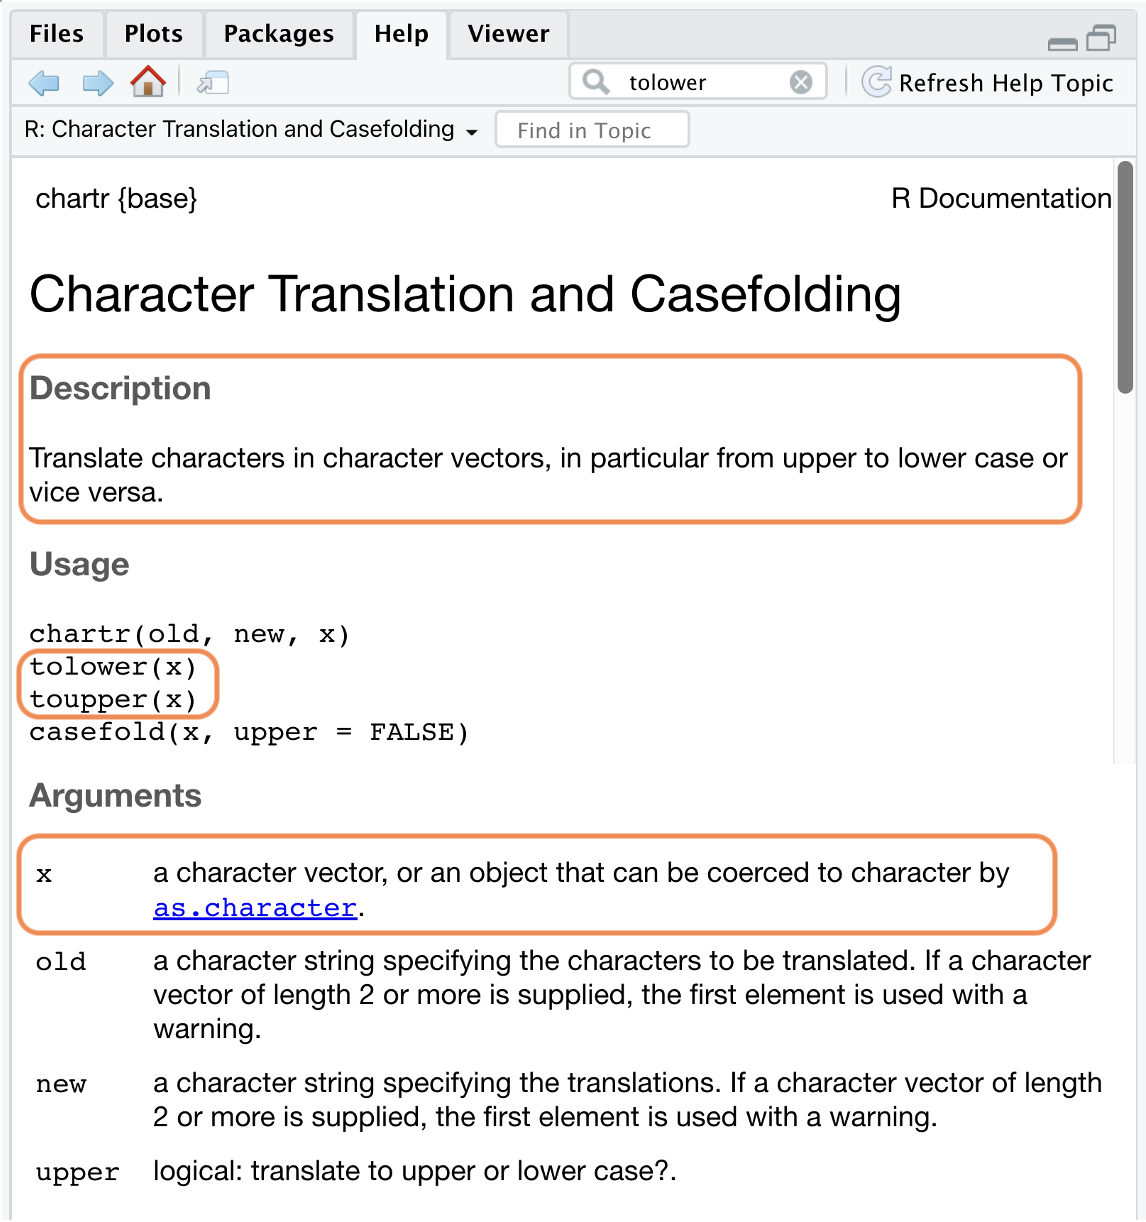
Figure 2.5: Help (I)
- The Description part describes the general purpose of this function. In this example, all functions introduced in this documentation translate characters in a character vector (from upper to lower case or vice versa).
- The Usage part shows the expected syntax. This section may contain multiple functions that share similar usage, but with different number and format of input. For example,
chartr()is expecting three arguments, which isold,newandx, respectively, buttolower()andtoupper()functions is only taking one argumentx. - The Arguments part provides detailed explanation for argument. Depending on the function, argument could be different from data type to input length, and it is best to read them individually. For our example, you can focus on the explanation of
xfortolower()andtoupper()functions for now, as this is the only required input for both of them.
Next, let’s move to the Details part,
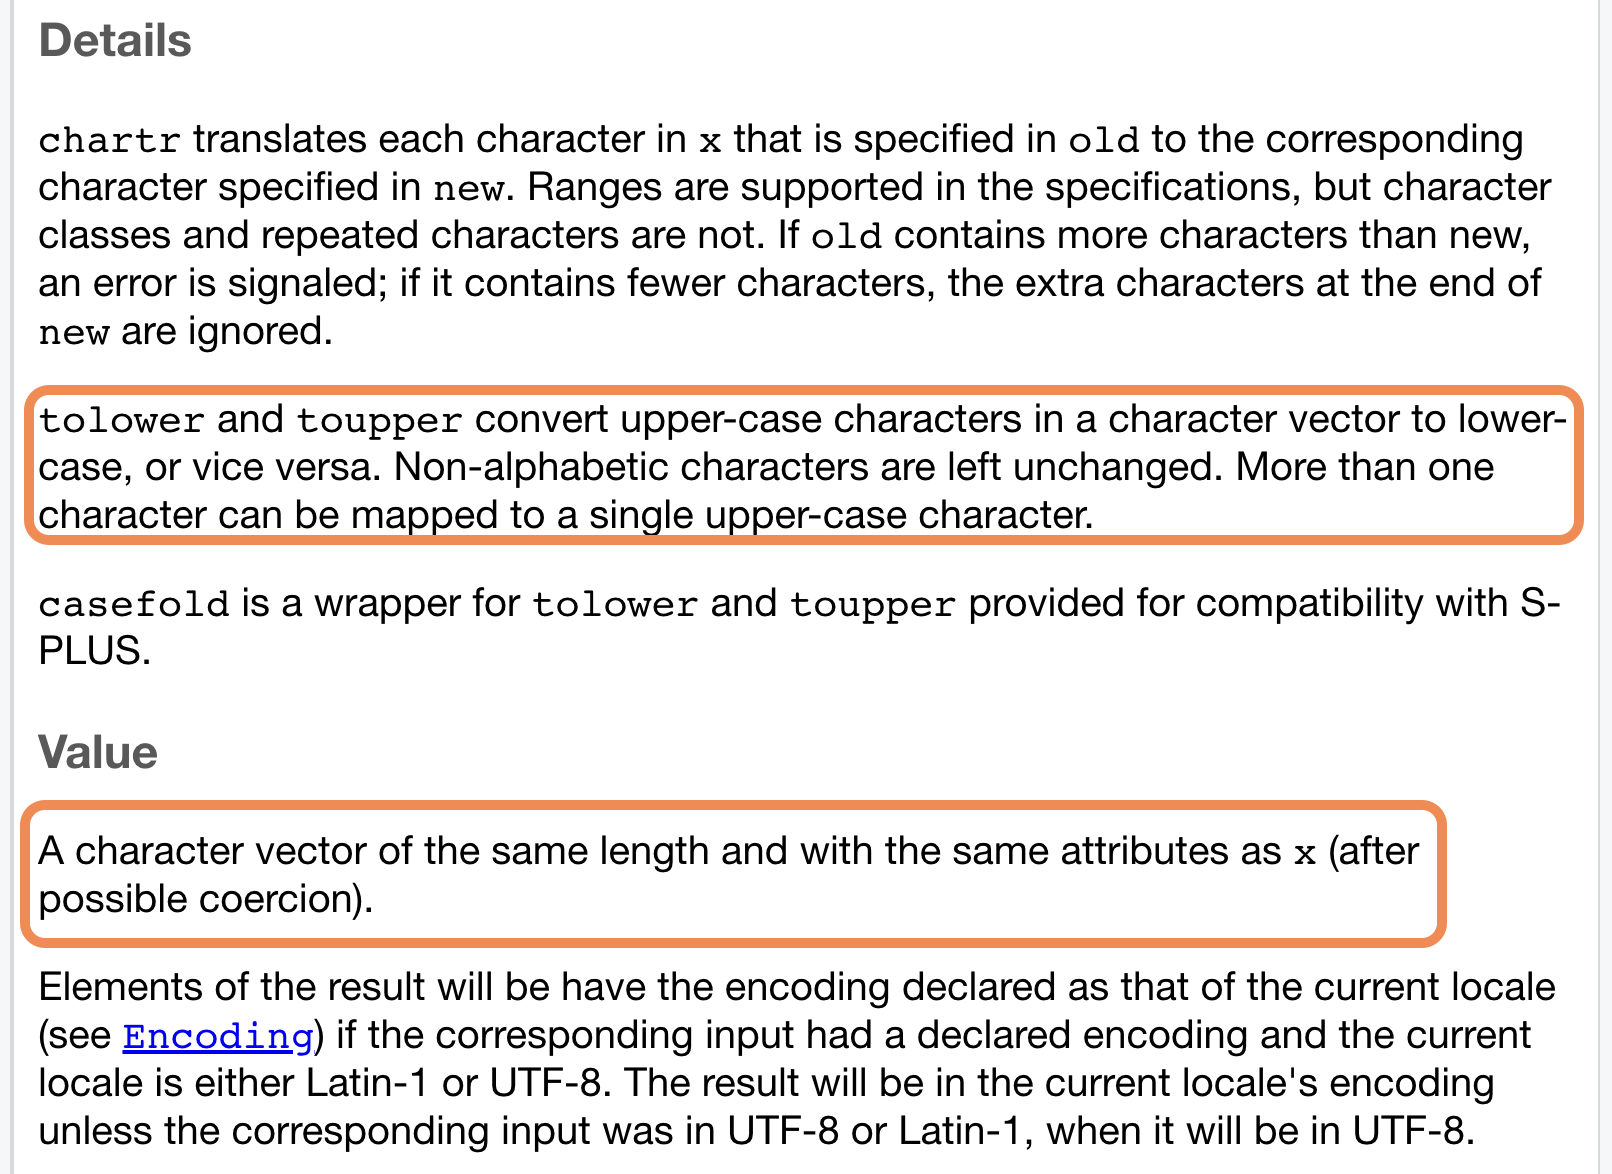
Figure 2.6: Help (II)
- The Details part explains the mechanism of the functions, as well as what each of them could achieve.
- The Value part shows the result that the function would return, with specified data attributes and types. For
tolower()andtoupper(), since we only covert the cases of characters, the returned character vector will share the samelength()as the input vector.
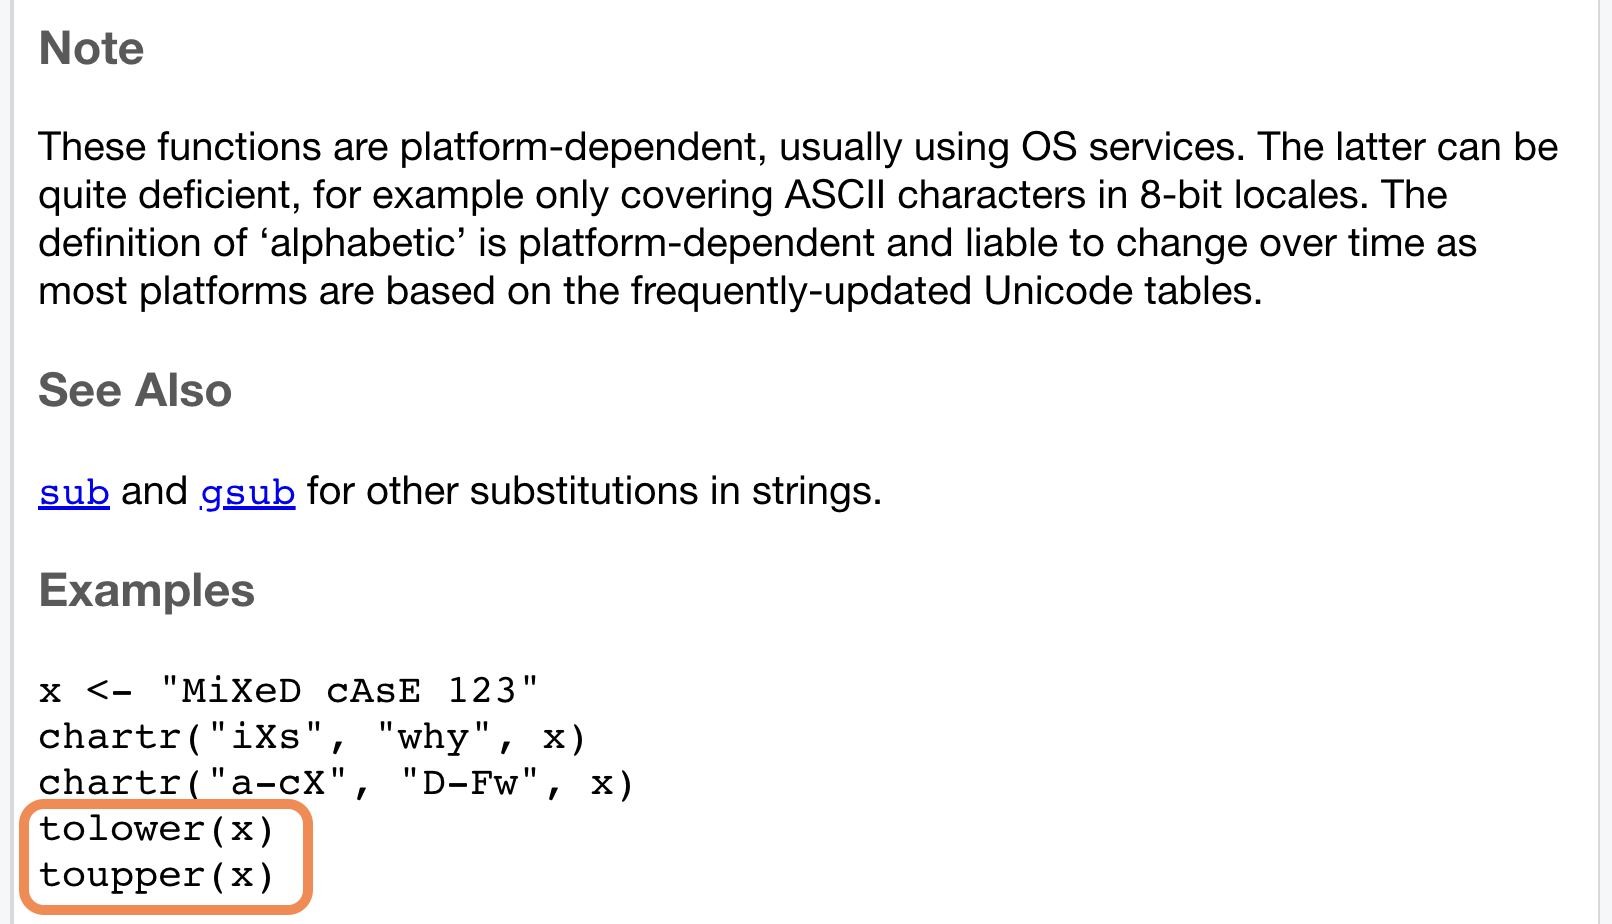
Figure 2.7: Help (III)
In the last part of the documentation, you can see the notes in the Note part and some functions related to functions introduced in the See Also part. Remember to try some sample codes in the Examples part, and implement your own codes with the help of the examples.
At the end of this section, let us review the environment panel. You can see all the character vectors with names in this section. Notice that now the vector type has been changed to chr (here chr is short for character).
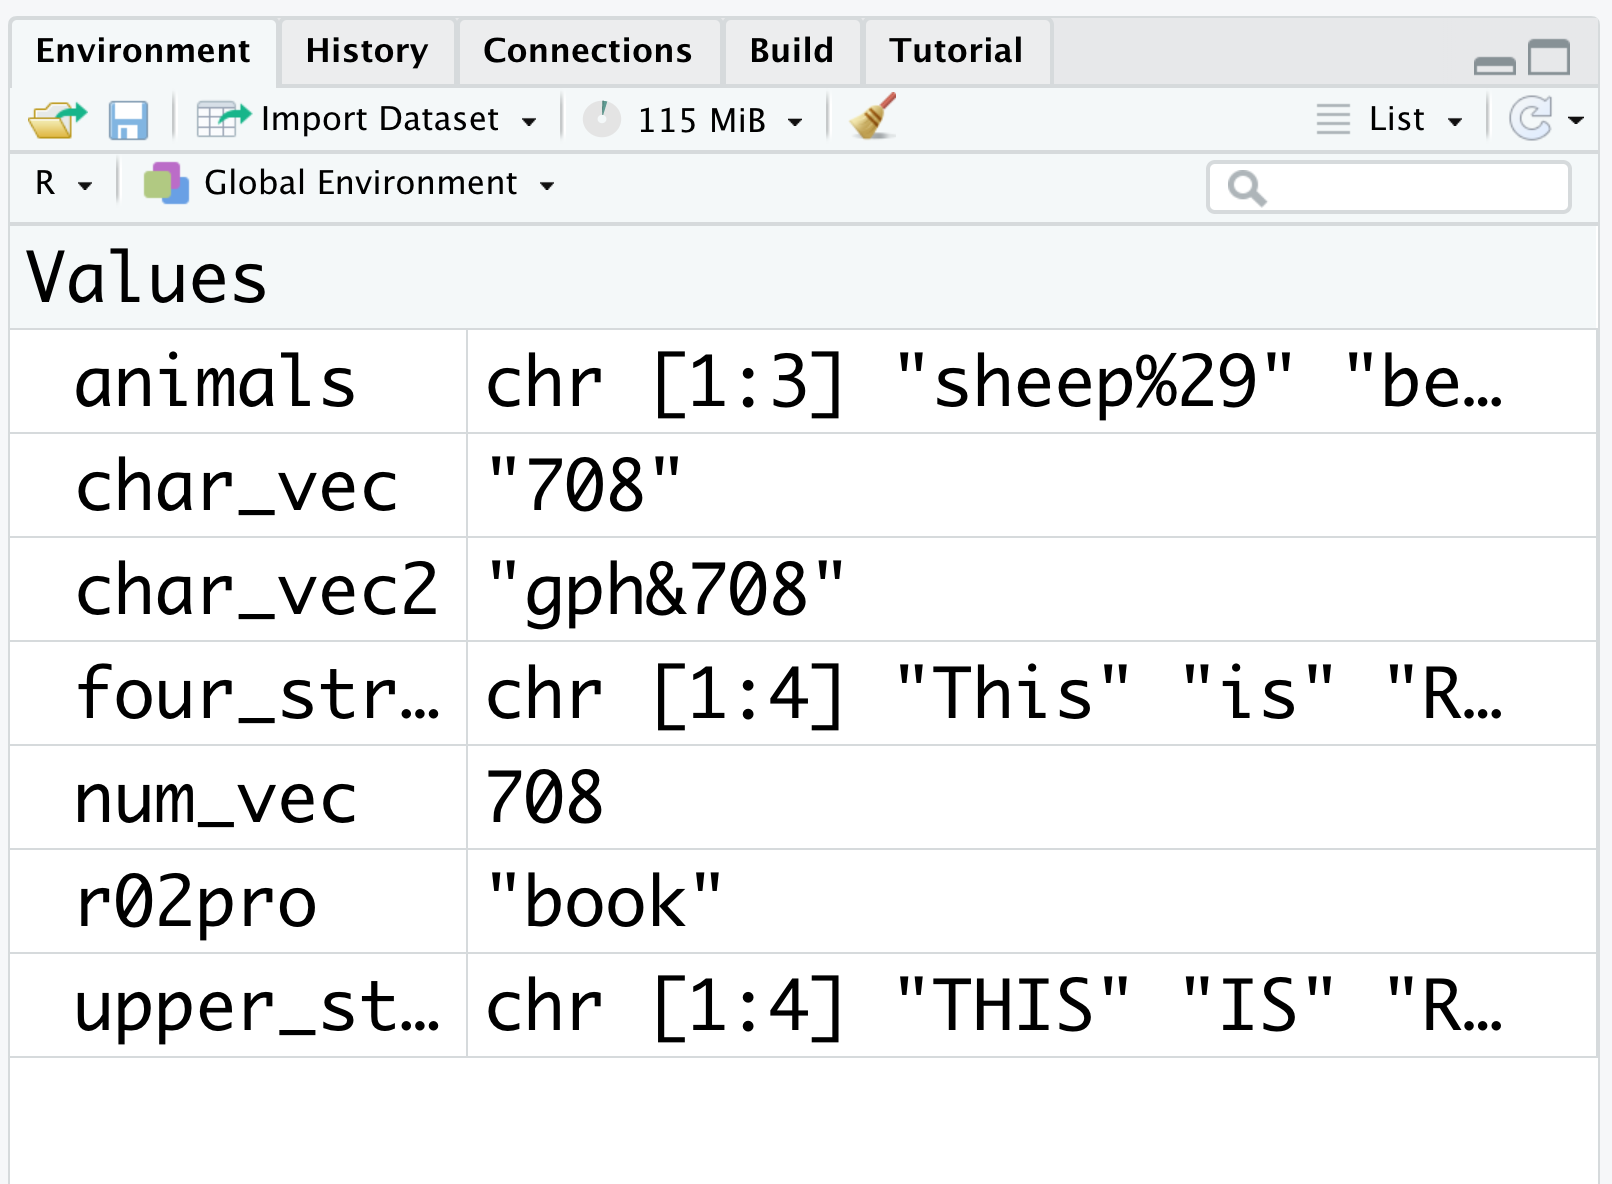
Figure 2.8: Character vectors
You can also see the list of all the named objects by using ls() function.
2.2.4 Exercises
Write R code to create a character vector named
char_1with values"I","am","learning","R!", get its length, find out its type, and concatenate the vector into a single string with space as the separator.For the
char_1defined in Q1, find the number of characters in each string, and convert each string to upper case.
